Lesson 5. Create a Project & Working Directory Setup
Set Up Your Working Directory
As you learned in the previous tutorial, project organization is integral to
efficient research. In this tutorial, you will create the project directory that
you will use for all of your work. This project directory will be carefully
organized with a \data directory that you will use to save all of the data you
use in your lessons.
Learning Objectives
At the end of this activity, you will be able to:
- Create an easy to use and well structured project structure.
- Set a working directory in
Rusing code. - Set a working directory using the
RStudiointerface.
What You Need
You will need the most current version of R and, preferably, RStudio loaded on
your computer to complete this tutorial.
Create earth-analytics Project Directory
Now that you have the basics of good project structure out of the way, let’s get
your project set up. You are going to create an earth-analytics project directory
(or folder) where you will store data and files used in the class. You will then
set that project directory as your working directory in R.
Data Tip: Directory vs Folder: You can think of a directory as a folder. However the term directory considers the relationship between that folder and the folders within it and around it (it’s full path).
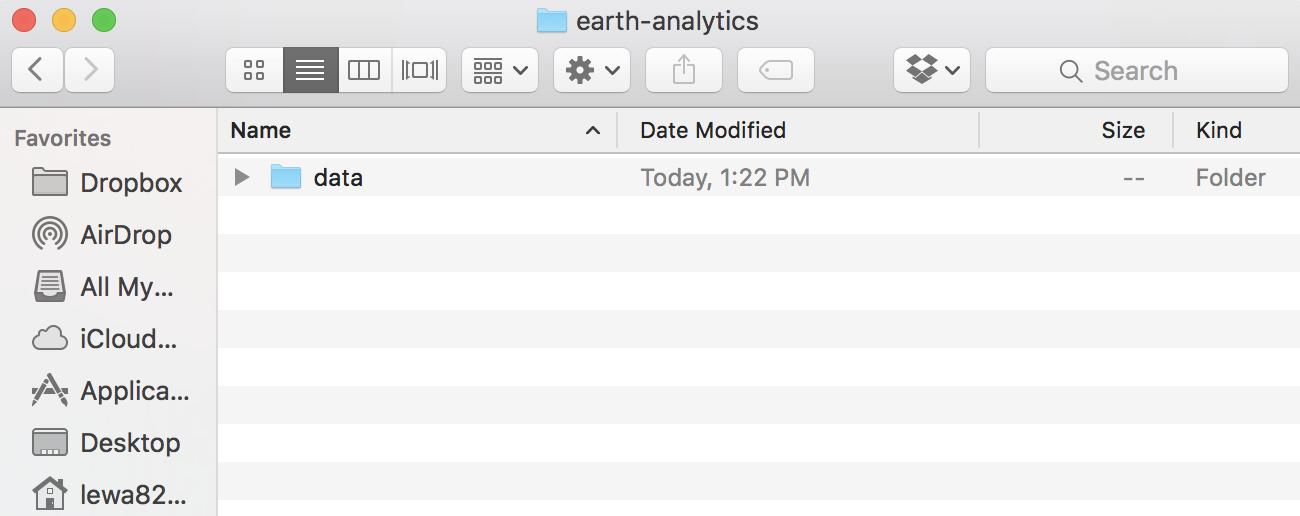
Follow the steps below to create an earth-analytics project directory on your
computer and then a data directory located within that project directory.
- Navigate to the
Documentsdirectory on your computer. - In the directory, create a NEW DIRECTORY called
earth-analytics.
Data Tip: Notice that you are creating an easy to
read directory name. The name has no spaces and uses all lower case to support
machine reading down the road. Sometimes this format of naming using dashes is
referred to as a slug.
- Next, open the earth-analytics directory and create a directory within it
called
data
You will use the data directory to store the data that you download to use in this course and in the tutorials hosted on this website.
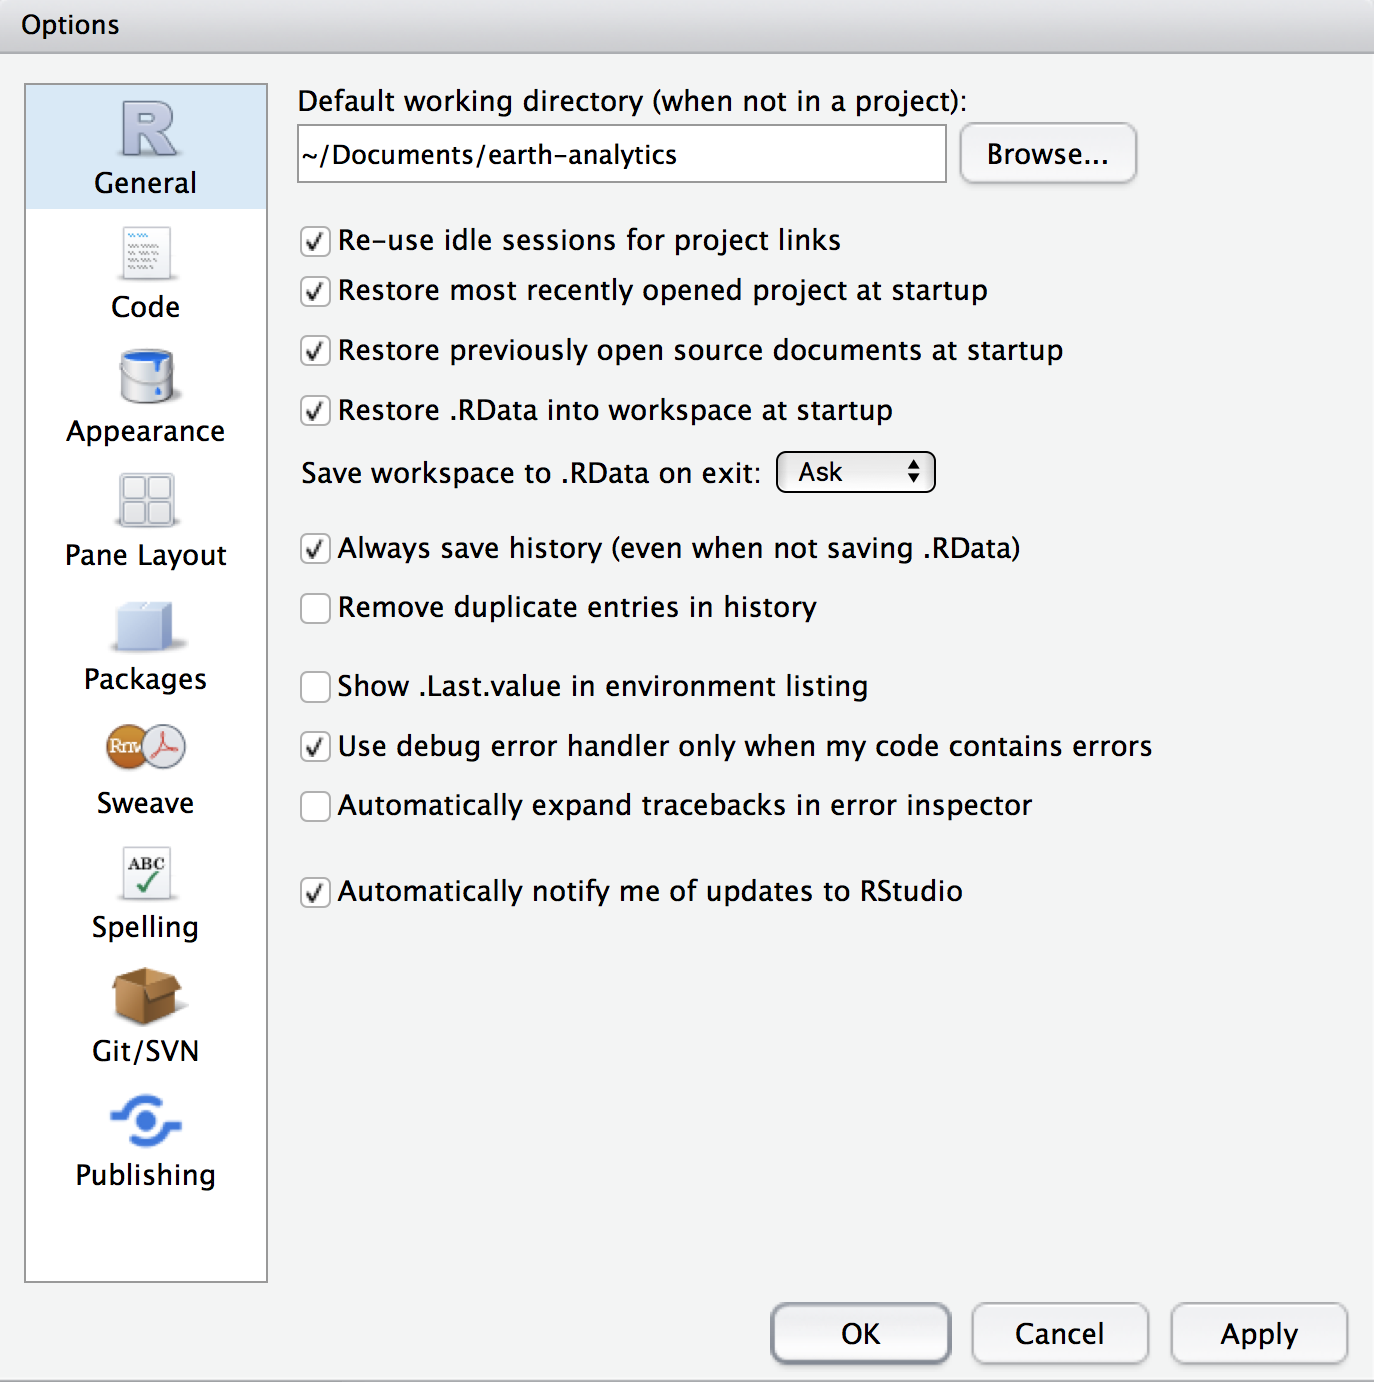
- The final step is optional but recommended - especially if you are new to
RandRStudio. Open upRStudioand set your default working directory to theearth-analyticsdirectory that you just created. InRStudiogo to: Tools –> Global Options –> Click on the General setting at the top of the global options panel` (see screen shot below). - Browse to the
earth-analyticsdirectory and set it as your default working directory.
When you set a default working directory, every time you open RStudio it will
default to that working directory being set. This can be nice if you are going
to always work in the same directory (like you will in all tutorials).
Finally, let’s see what your main working directory looks like. Use the getwd()
function to find out what your current working directory is in R.
# view working directory
getwd()
[1] "/Users/lewa8222/Documents/earth-analytics"
If your working directory path does not match the location where you created your
earth-analytics directory on your computer, then you need to fix it. You can
set the working directory with R code OR you can use the RStudio interface to
set the working directory.
Set Working Directory in RStudio Interface
Let’s set the working directory using the RStudio interface.
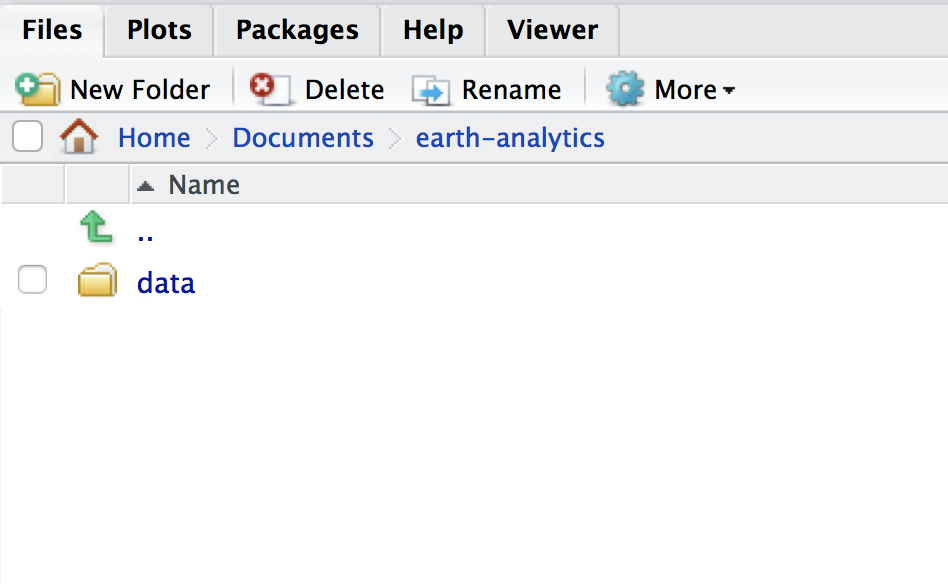
- In the
RStudiointerface, look at the pane in the LOWER LEFT hand corner of your screen. It should have a tab calledFileswhich opens the files window. In the files window, navigate to yourearth-analyticsdirectory which should be within theDocumentsdirectory.
Your window should look like the screen shot below:
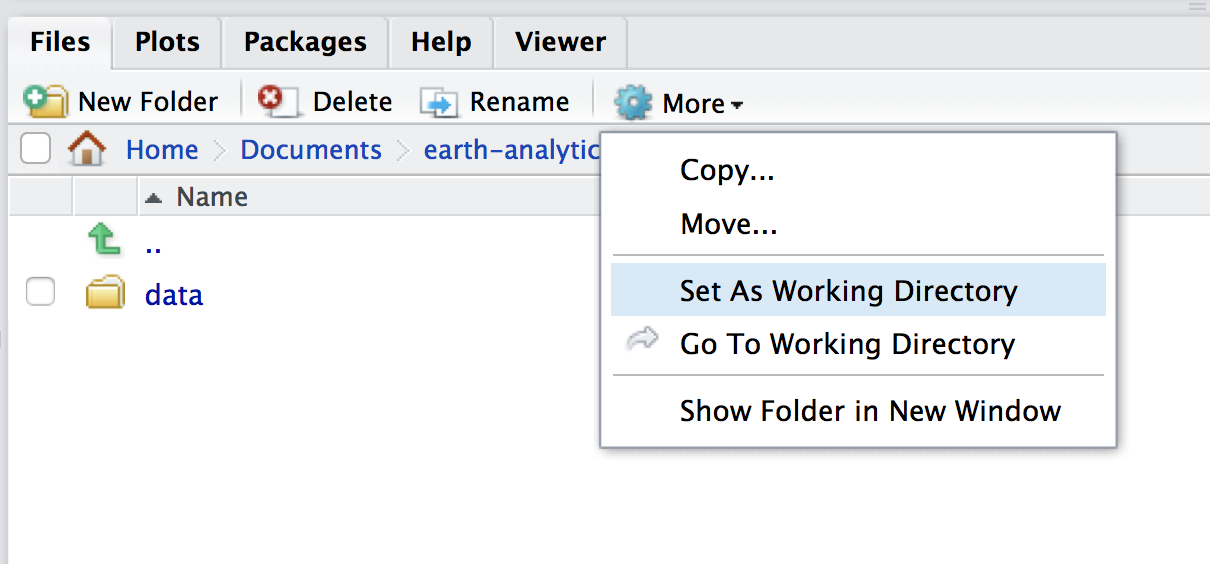
- Next, click on the
Moredrop down. ChooseSet as working directory
Set Working Directory Using Code
You can set the working directory using code in R too. You don’t have to do this
if you already set the working directory above. However, it’s good to know how
to do it - particularly if you get into more advanced scripting in R. You use the
setwd() function to set a new working directory as follows:
# set working directory - MAC File Structure - backslashes
setwd("/Users/lewa8222/Documents/earth-analytics")

# a windows machine uses front slashes. There is normally a
# drive letter like C:\
setwd("C:\Users\lewa8222\Documents\earth-analytics")
All Done!
Great work! You are now ready to start working with RStudio!
Share on
Twitter Facebook Google+ LinkedIn
Leave a Comment