Lesson 2. Get Started With Jupyter Notebook For Python
Learning Objectives
- Launch and close a
Jupyter Notebooksession. - Navigate the
Jupyterdashboard. - Create and open
Jupyter Notebookfiles (.ipynb).
Launch Jupyter Notebook From the Terminal
Throughout this chapter, you will learn how to use Jupyter Notebook to write and document your Python code. First, you need to know how to open Jupyter Notebook, which is done in the Terminal.
It is ideal (but not required) to launch Jupyter Notebook from the working directory where all of the notebook files that you wish to use live, so you can easily access the files you need.
IMPORTANT: the jupyter notebook command requires that you have Jupyter Notebook installed on your computer! Jupyter Notebook was installed when you created the earth-analytics-python environment as a part of the setup for this textbook. Be sure to activate the environment in the terminal using the command conda activate earth-analytics-python before launching Jupyter Notebook.
Use Bash to Change to Your Working Directory
Begin by opening your terminal (i.e. Git Bash for Windows or the terminal on Mac or Linux).
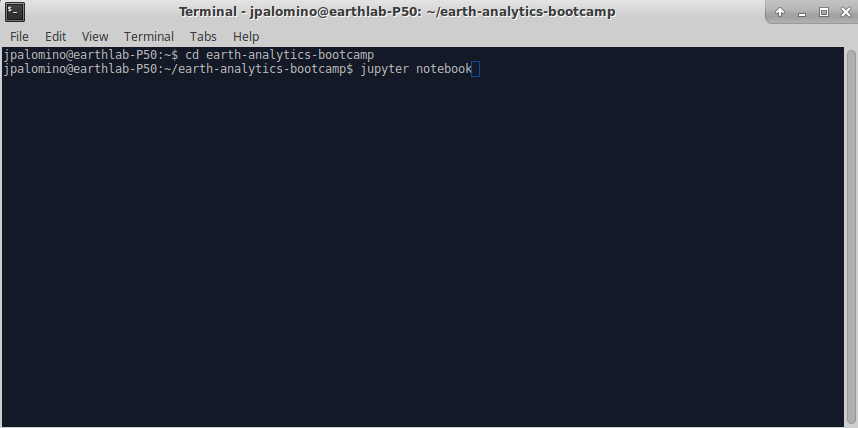
Change the current working directory to your desired directory (e.g. earth-analytics under your home directory) using cd directory-name.You can then check that the current working directory has been updated (pwd).
$ cd ~/earth-analytics
$ pwd
    /users/jpalomino/earth-analytics
Begin a Jupyter Notebook Session From the Terminal
Now you can start a new Jupyter Notebook session by typing the command jupyter notebook in the Terminal.
$ jupyter notebook

NOTE: If you get an error jupyter: command not found, this means that you have not activated the conda environment that you installed for this textbook. Be sure to activate the environment in the terminal using the command conda activate earth-analytics-python before running the jupyter notebook command.
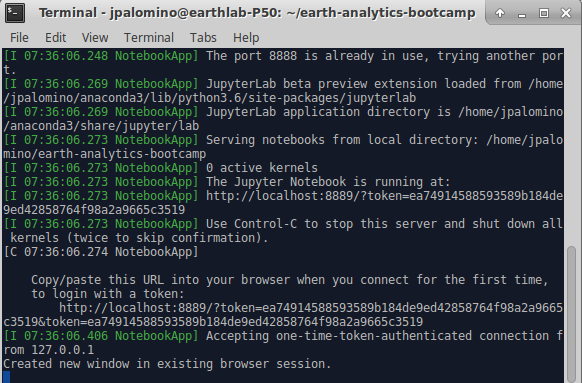
When you type this command into the terminal, it will launch a local web server on your computer. This server runs the Jupyter Notebook interface.
You will notice that the Terminal is running commands to start your Jupyter Notebook session. Be sure to leave the Terminal open while you use Jupyter Notebook. It is running a local server for Jupyter Notebook so that you can interact with it in your web browser.

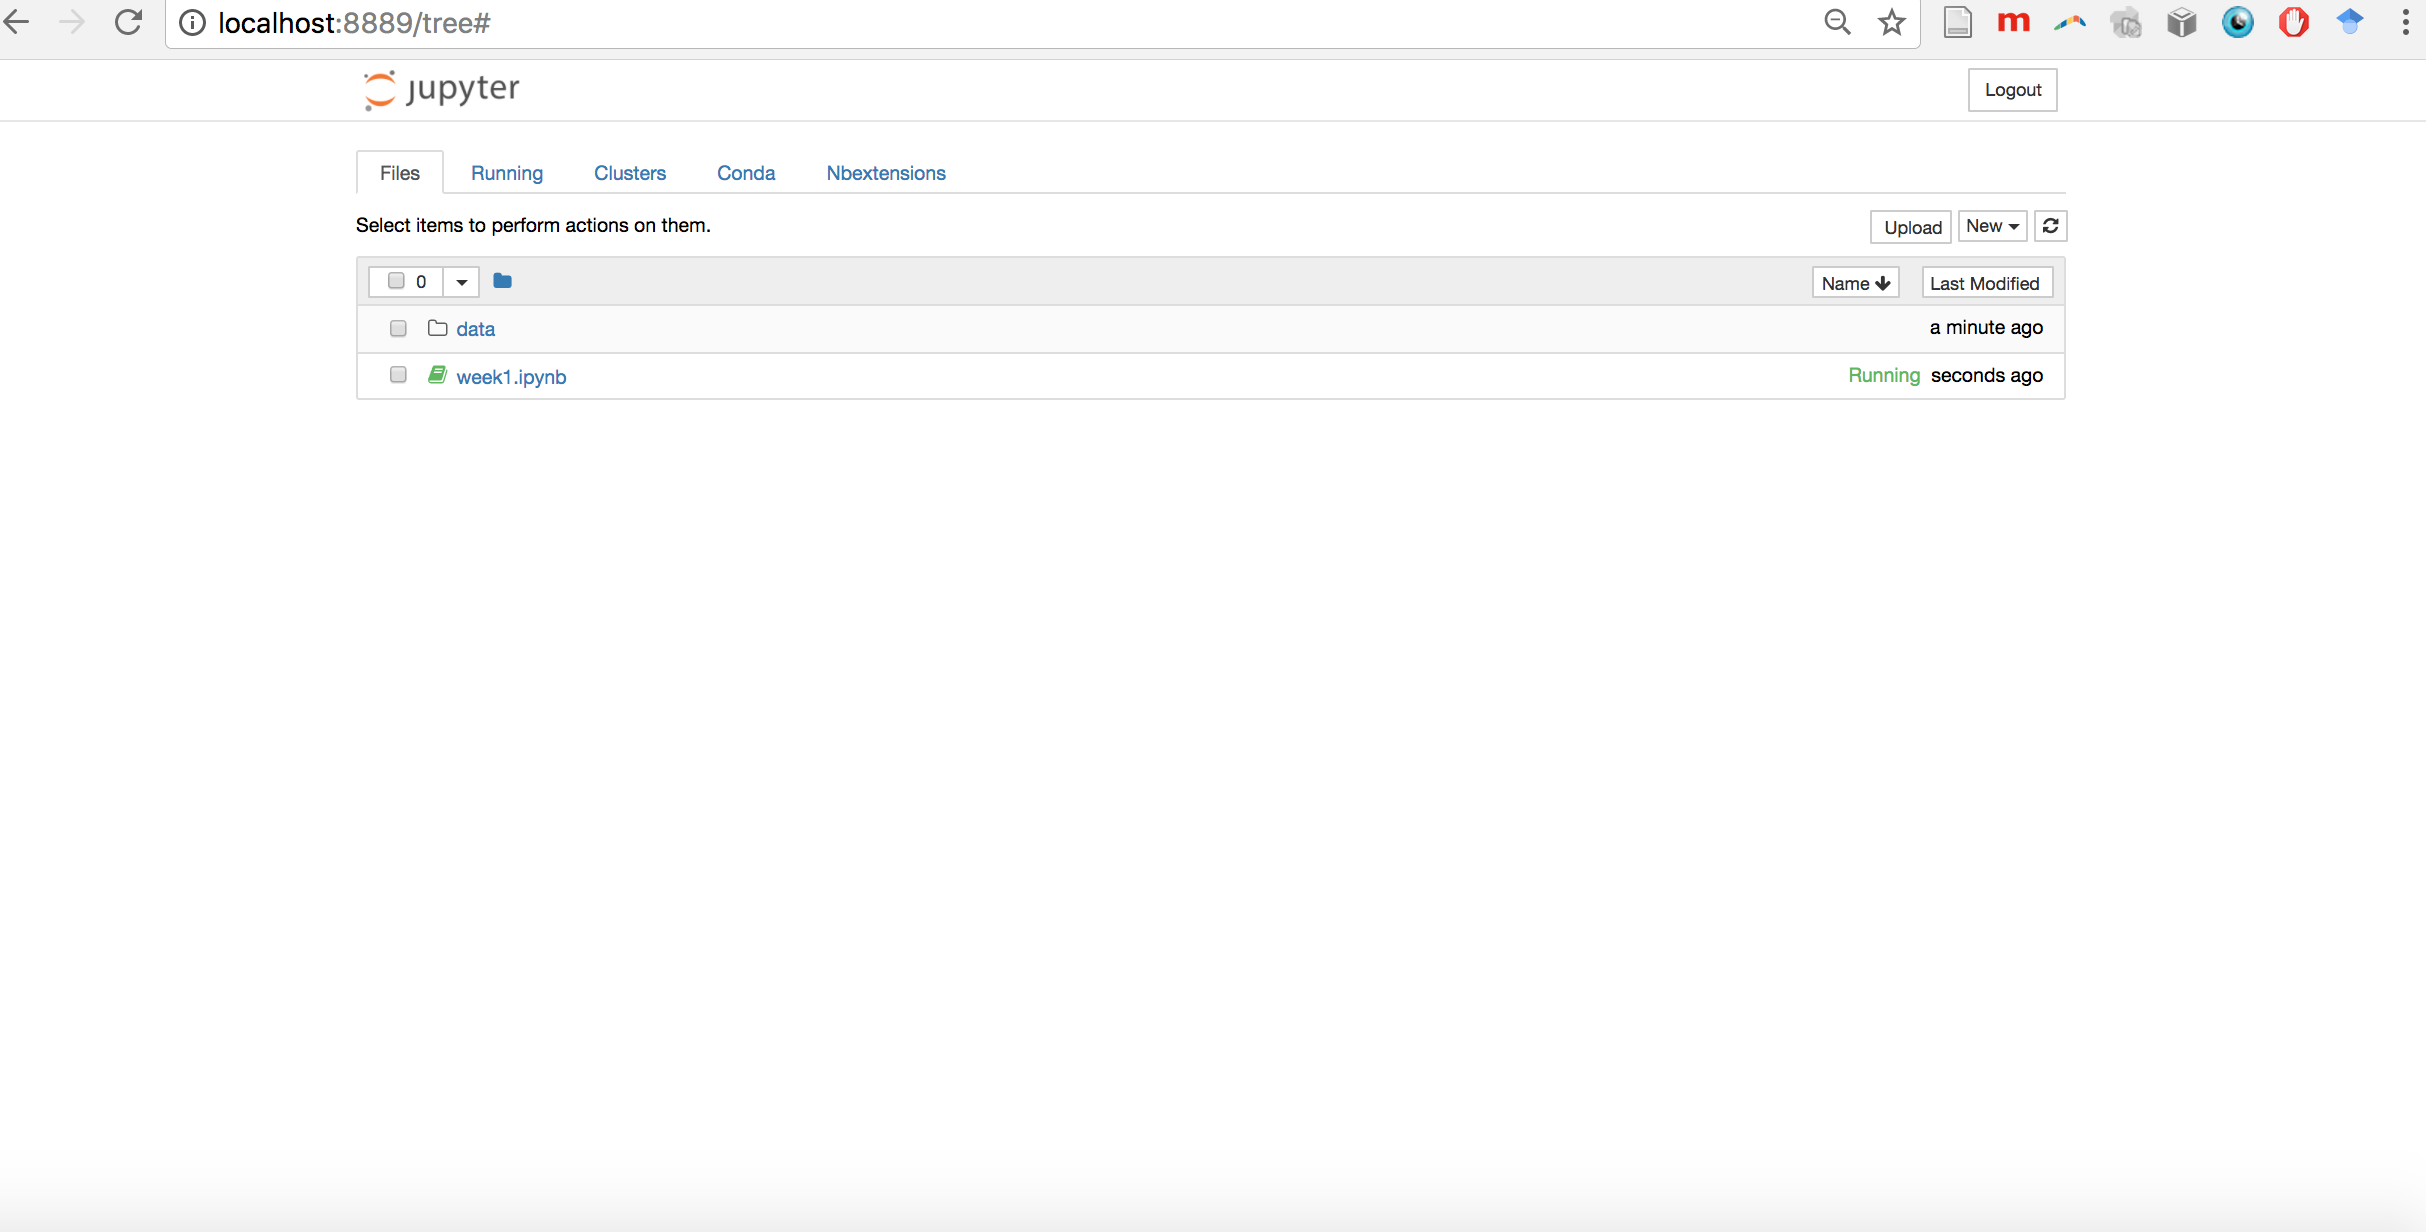
If your commands were successful, your default web browser will open with a new tab that displays your Jupyter Notebook dashboard.
The dashboard serves as a homepage for Jupyter Notebook. Its main purpose is to display the notebooks and files in the current directory.

Data Tip: While Jupyter Notebook looks like an online interface, when you launch it from the terminal, like you did in this lesson, it is actually running locally on our computer. You do not need an internet connection to run Jupyter Notebook locally.
Navigate Files Using the Jupyter Notebook Dashboard
To find files in the Jupyter Notebook dashboard, you can click on the name of a directory (e.g. ea-bootcamp-day-1), and the dashboard will update to show you the contents of the directory.

You can return to the parent directory of your current directory in the Jupyter Notebook session by clicking on the folder icon on the top menu bar.

Create New Jupyter Notebook Files
You can create new Jupyter Notebook files (.ipynb) from the dashboard.
On the top right of the dashboard, there are two buttons for Upload and New. Upload allows you to import an existing Jupyter Notebook file (.ipynb) that is not already in that directory.
You can create a new Python 3 Jupyter Notebook file (.ipynb) by clicking on New and selecting Python 3. A new notebook will open a new tab in your web browser.

Open Jupyter Notebook Files
You can open existing Jupyter Notebook files (.ipynb) in the Jupyter Notebook dashboard by clicking on the name of the file in the dashboard (e.g. filename.ipynb).
Note: if you don’t see the Jupyter Notebook file (.ipynb) or directory that you are looking for, you may need to navigate to another directory in the dashboard (see above). You may also need to launch the Jupyter Notebook from a different directory.
Close Your Jupyter Notebook Session
Close and Shutdown Jupyter Notebook Files
To close your Jupyter Notebook files (.ipynb), you can close the browser tab displaying the notebook, but you still need Shutdown the notebook from the dashboard.
To Shutdown a Jupyter Notebook file (.ipynb), click in the checkbox to left of the filename. You will see an orange button named Shutdown appear in the top left of the dashboard menu; click on it to Shutdown any file that is checked in the list.

Shutdown the Jupyter Notebook Local Server
After all of your notebooks are closed and shut down, you can end your Jupyter Notebook session by clicking on the QUIT button at the top right of the dashboard. You can now close the browswer tab for Jupyter Notebook.
If desired, you can also close your terminal by typing the command exit and hitting Enter.
NOTE: You can also shutdown a Jupyter Notebook session by clicking in the Terminal window and clicking Ctrl+c. You will be asked to confirm that you want to Shutdown this notebook server (y/[n])?. Type y and hit Enter to confirm. Then, you can close the Terminal by typing the command exit and hitting Enter.
Share on
Twitter Facebook Google+ LinkedIn
Leave a Comment